2. Using SSD as Expanded Storage (SD Card + SSD)
This chapter will guide you on how to configure an M.2 NVMe SSD as expanded storage for your Raspberry Pi 5 (meaning the system still runs on the SD card, and the SSD is used for storing data).
First, log in to your Raspberry Pi 5 system via SSH or by directly connecting a keyboard and monitor.
Step 1: Modify Boot Configuration
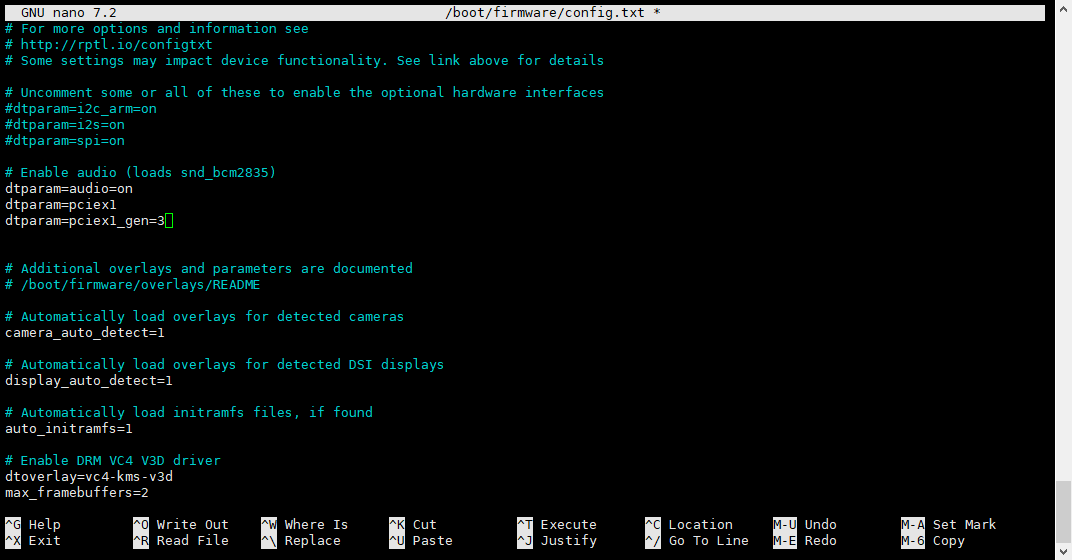
Edit the
/boot/firmware/config.txtfile. Using thenanoeditor is recommended:sudo nano /boot/firmware/config.txt
Add the following two lines at the end of the file:
dtparam=pciex1
dtparam=pciex1_gen=3
Press
Ctrl+X, thenY, and finallyEnterto save and exit the editor.
Step 2: Install Hardware
Power off the Raspberry Pi 5.
Following the instructions for your M.2 adapter, correctly install your NVMe SSD onto the M.2 adapter.
Step 3: Check SSD Recognition
Reconnect the power and boot up the Raspberry Pi 5.
Open a terminal and execute the following commands to check the PCI-E devices and block device list, confirming if your SSD is recognized by the system:
lspci
lsblk
You should see information similar to
NVMe SSDor the specific model name, along with a new block device (e.g.,/dev/nvme0n1).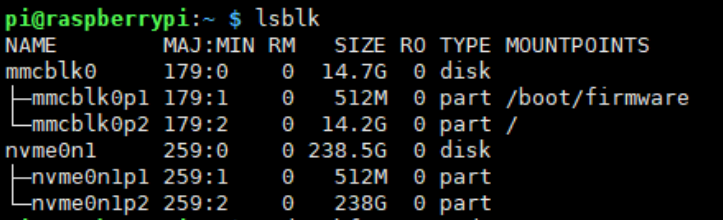

Step 4: Format the SSD
Use the
mkfs.ext4command to format the SSD with the ext4 filesystem. Please replace ``/dev/nvme0n1`` with the actual device name you identified in the previous step.Warning
Formatting will erase all data on the SSD. Proceed with caution!
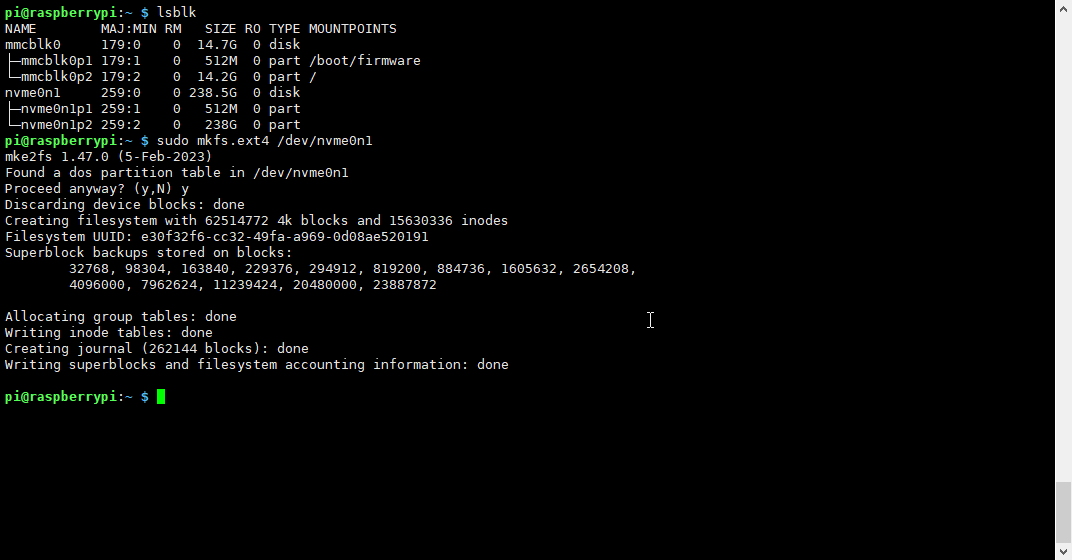
sudo mkfs.ext4 /dev/nvme0n1
The system might prompt you about detecting a partition table; type
yand pressEnterto continue.After formatting is complete, use
lsblkagain to confirm the device status.lsblk
Now,
/dev/nvme0n1should no longer have an associated mount point.
Step 5: Mount the SSD
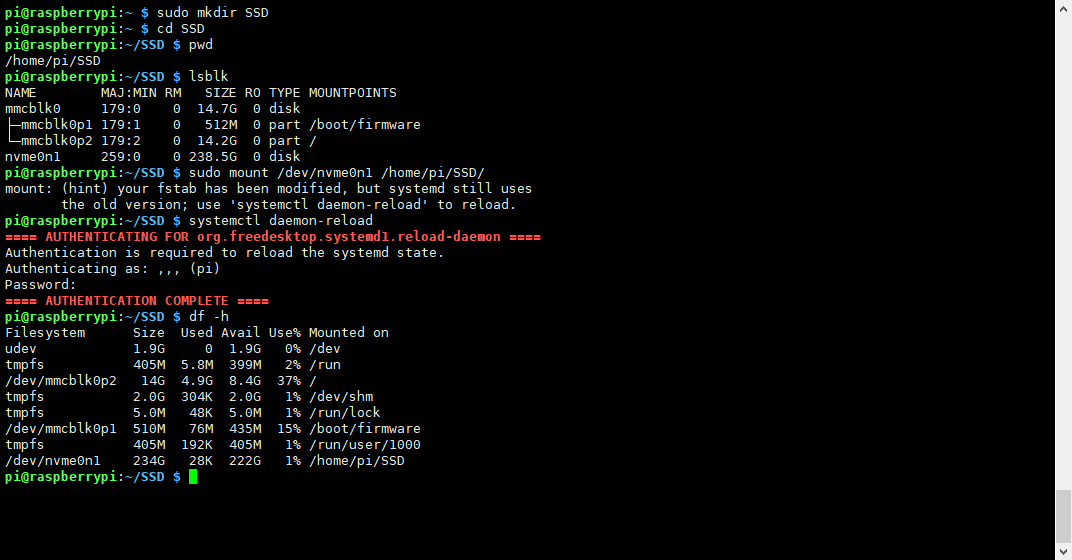
Create a directory to serve as the mount point for the SSD. For example, create a directory named
SSDin the user’s home directory:mkdir ~/SSDManually mount the SSD to this directory:
sudo mount /dev/nvme0n1 ~/SSD
To make the system automatically mount the SSD on every boot, you need to edit the
/etc/fstabfile:sudo nano /etc/fstab
Add the following line at the end of the file. Again, be sure to replace the device name and mount path with your actual names:
/dev/nvme0n1 /home/pi/SSD ext4 defaults 0 0
This assumes your username is
piand the mount point is/home/pi/SSD. Modify according to your actual setup.Press
Ctrl+X,Y,Enterto save and exit.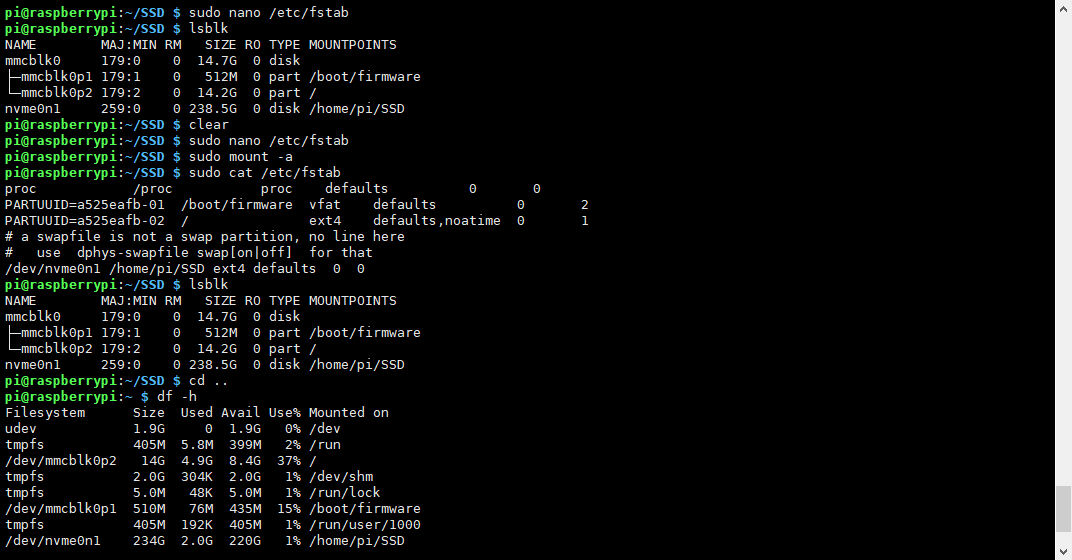
Execute the following command to apply the mount, or simply reboot the Raspberry Pi:
sudo mount -a
After rebooting, you can use the
df -hcommand to check if the SSD is successfully mounted:df -hYou should see
/dev/nvme0n1mounted at/home/pi/SSD.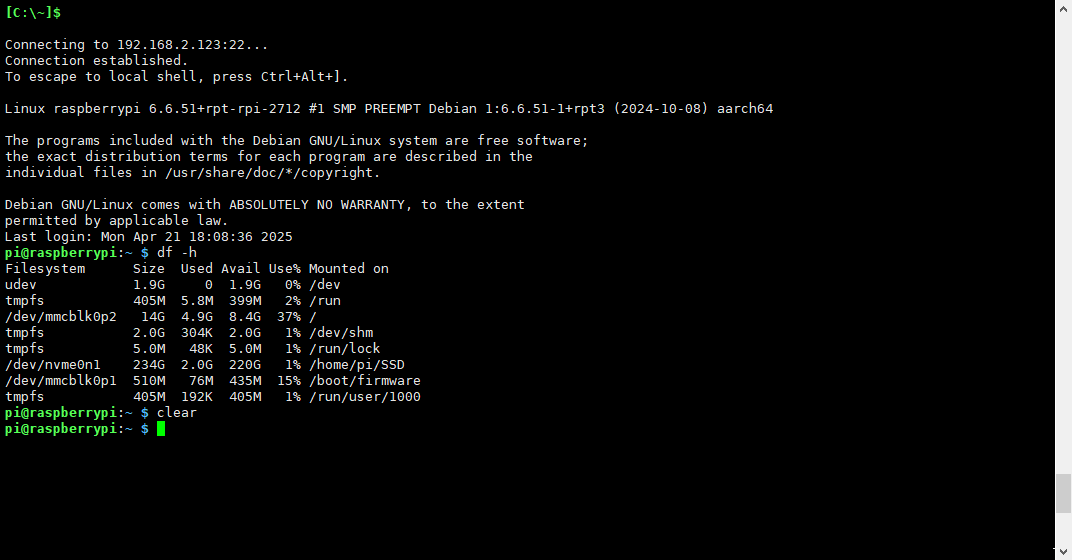
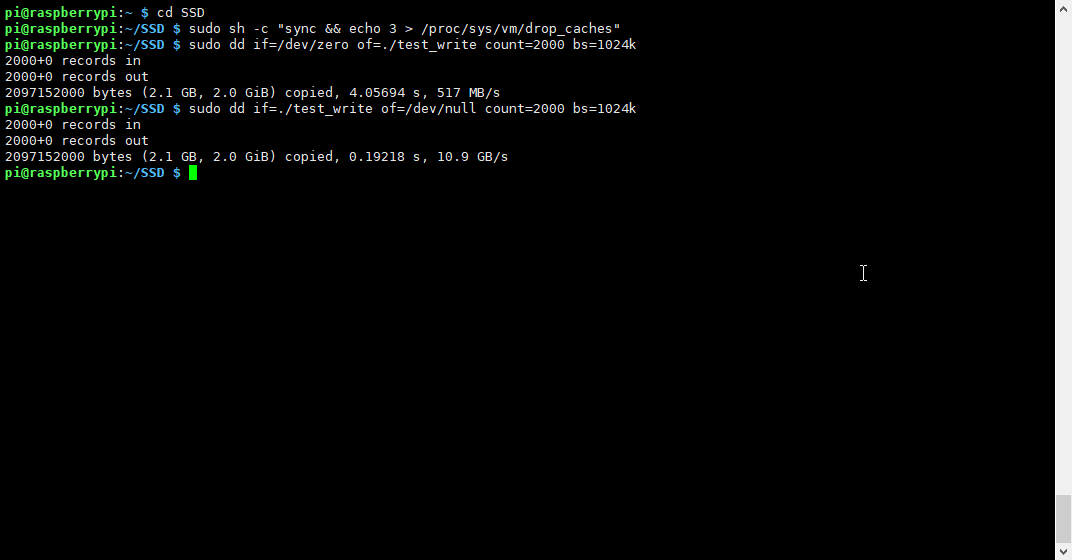
Step 6: (Optional) Test Read/Write Speed
To get more accurate test results, you can first clear the filesystem cache:
sudo sh -c "sync && echo 3 > /proc/sys/vm/drop_caches"
Test write speed (writes an approximately 2GB file):
sudo dd if=/dev/zero of=~/SSD/test_write bs=1M count=2000 status=progress
Test read speed (reads the file just written):
sudo dd if=~/SSD/test_write of=/dev/null bs=1M status=progress
After testing, delete the test file:
rm ~/SSD/test_write
Note
Read/write speeds are affected by various factors like the SSD model, Raspberry Pi load, etc. The test results are for reference only.
At this point, you have successfully configured the M.2 NVMe SSD as expanded storage for your Raspberry Pi 5.